

How to Change Oxygen (O2) Sensor?
What is O2 (Oxygen) Sensor?
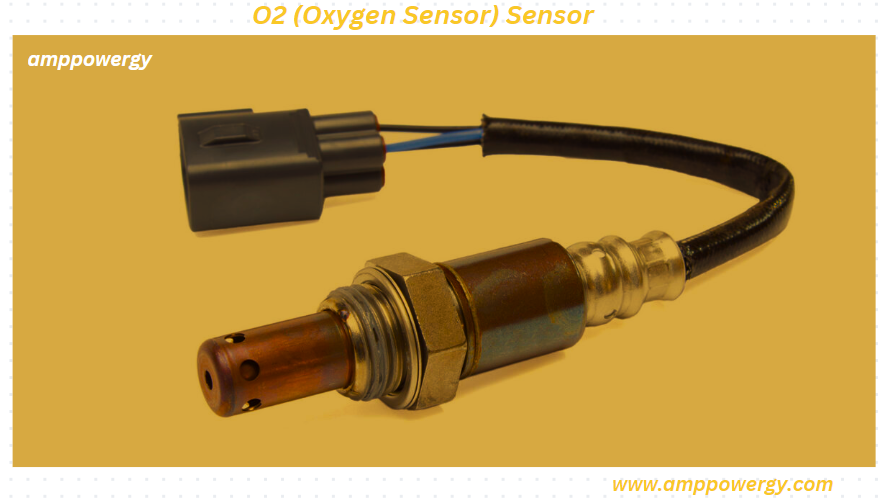
O2 sensor stands for oxygen sensor. An oxygen sensor is a device that monitors the level of oxygen in the exhaust gases of an internal combustion engine. It plays an important role in the vehicle’s fuel and exhaust system.
The main function of the oxygen sensor is to measure the amount of oxygen in the exhaust gases and provide feedback to the engine control module (ECM) or engine control unit (ECU). This information helps the engine management system adjust the air-fuel mixture in real time to improve combustion and reduce emissions.
Oxygen sensors are commonly used in vehicles to ensure that the engine operates efficiently while meeting emission standards. There are different types of oxygen sensors, including narrowband and wideband sensors, each with its own specific application in air-fuel ratio control.
Replacing an oxygen (O2) sensor can be a relatively simple task, but proper procedures must be followed to ensure a successful replacement. Remember that specific steps may depend on the make and model of your vehicle, so always consult your vehicle’s service manual for accurate information. Here is a general guide:
Note: Before starting, make sure the engine is cold and the vehicle is safely raised or supported. Also, disconnect the negative terminal of the car battery to ensure safety.
How to Change O2 Sensor?
Materials Needed
- New O2 sensor
- O2 sensor socket (if necessary)
- Wrench or Ratchet and Socket Set
- Anti-Seizure Compound (Recommended)
- Jack and jack stands (if necessary)
Steps
Locate the O2 Sensor
Depending on your vehicle, the O2 sensor(s) may be located in the exhaust manifold, exhaust pipe, or catalytic converter.
Refer to your vehicle’s service manual to identify the exact location of the O2 sensor.
Disconnect the battery:Disconnect the negative terminal of the car battery to prevent any electrical problems during the changeover.
Remove the Old O2 Sensor:If the O2 sensor is accessible from under the hood, use a wrench or ratchet and socket to remove it.If it is located under the vehicle, you may need to raise the vehicle using a jack and secure it to jack stands.Use the O2 sensor socket or a suitable tool to loosen and remove the old sensor.
Install the New O2 Sensor:Apply a small amount of anti-seize compound to the threads of the new O2 sensor (if not already applied).Screw the new sensor in by hand to avoid cross-threading, then tighten it using the O2 sensor socket or a suitable tool.
Reconnect the battery:Reconnect the negative terminal of the vehicle battery.
Clear the error code (if necessary):If you had a bad O2 sensor that triggered the check engine light, you may need to clear the fault code using an OBD-2 scanner.
Test Drive:Take the vehicle for a test drive to make sure the new O2 sensor is working properly.
Always refer to your vehicle’s service manual for specific instructions and torque specifications. If you are not comfortable or familiar with this process, consider seeking professional help or consulting a mechanic for an alternative.

How to Clear Error Code of O2 Sensor
To clear error codes associated with a faulty oxygen (O2) sensor, you can use the On-Board Diagnostics II (OBD-2) scanner. Here are the general steps:
Materials Needed:
- OBD-2 Scanner
Steps
Locate the OBD-2 Port:The OBD-2 port is usually located under the dashboard near the driver’s seat. Check the manual of the vehicle for exact location of the O2 sensor.Connect the OBD-2 scanner to the OBD-2 port in your vehicle.
Turn on the ignition:Set the ignition key on “ON” position and do it without starting the engine. Some vehicles may require the engine to run, so check your vehicle’s manual for guidance.
Access the OBD-2 scanner menu:Navigate through the menu on the OBD-2 scanner to find the option to read and clear trouble codes. Exact steps may vary depending on the scanner model.
Read the code: Once in the menu, select the Read Trouble Code option. The scanner will communicate with your vehicle’s computer and display any stored fault codes.
Clear code:After reviewing the codes, look for the option to clear or erase the codes. Select this option, and the scanner will send a command to the vehicle’s computer to clear the stored code.
Confirm completion:Confirm that the codes have been cleared successfully. Some scanners may display a message indicating that the operation was successful.
Turn off the ignition:Turn off the ignition and disconnect the OBD-2 scanner.
Restart the vehicle: Restart the engine and check that the engine light is no longer illuminated. If the problem is resolved, the light should stay off.
Note:
Clearing the code will also reset the vehicle’s readiness monitor, which may take some time to complete before passing the emissions test.If the underlying problem causing the O2 sensor malfunction is not addressed, the check engine light may return.
Always follow the specific instructions provided with your OBD-2 scanner, as the process may vary between different models. If you don’t have an OBD-2 scanner or are unsure of the procedure, consider consulting a professional mechanic or auto service center.
See Also:
Frequently asked questions
Q: Why should I replace my O2 sensor?
Ans: O2 sensors play an important role in improving fuel efficiency and reducing emissions. A faulty sensor can lead to poor fuel economy, increased emissions, and possible damage to the catalytic converter.
Q: How often should I replace my O2 sensor?
Ans: you should replace O2 sensors when you drive a vehicle between 50,000 and 100,000 miles. However, it is important to monitor your vehicle’s performance and address any signs of a failed sensor immediately.
Q: What are the symptoms of a failed O2 sensor?
Ans: Common symptoms include reduced fuel efficiency, a rough idle, a noticeable decrease in performance, and the illumination of the check engine light.
Q: Can I replace the O2 sensor myself?
Ans: Yes, replacing the O2 sensor is often a straightforward task. Many car owners with basic mechanical skills choose to do it themselves. However, if you are unsure or uncomfortable, it is advisable to consult a professional mechanic.
Q: Do I need any special tools to replace the O2 sensor?
Ans: An O2 sensor socket is often helpful for removing and installing the sensor. Additionally, a wrench or ratchet and socket set may be required. An anti-seize compound is recommended to facilitate future removal.
Q: Should I disconnect the battery before replacing the O2 sensor?
Ans: Yes, it is a good practice to disconnect the negative terminal of the car battery before replacing the O2 sensor to ensure safety and prevent electrical problems.
Q: Do I need to tow the car to replace the O2 sensor?
Ans: Depending on your vehicle’s configuration, the O2 sensor may be accessible under the hood or under the vehicle. If it’s under the car, you may need to use a jack and jack stand.
Q: Can I drive with a bad O2 sensor?
Ans: Although you can drive with a bad O2 sensor, it is not recommended. A bad sensor can increase emission and decrease fuel efficiency. Additionally, it can damage other components, such as the catalytic converter.
Q: Do I need to reset the check engine light after replacing the O2 sensor?
Ans: If the check engine light was triggered by a bad O2 sensor, it is recommended to use an OBD-2 scanner to clear the error code after replacing the sensor.
Q: Can I use any O2 sensor for my vehicle, or does it need to be made and model specific?
Ans: It is important to use an O2 sensor that is compatible with the make and model of your vehicle. Consult your vehicle’s service manual or a parts specialist to ensure you get the correct replacement sensor.
1 thought on “How to Change Oxygen (O2) Sensor?”